This is the online user guide for pfcalc (pipe friction calculator) and the two official GUI front-ends: gpfcalc and Qpfcalc. For a brief description and download links, see the project website.
This how-to will guide you in downloading, installing, and using pfcalc 1.0
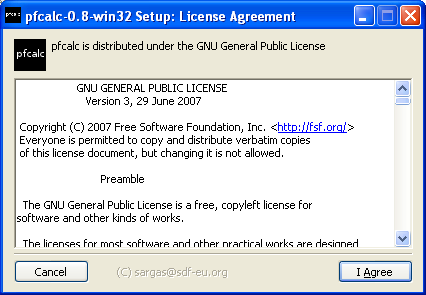
The Windows version of pfcalc 1.0 can be downloaded from the project hosting at Sourceforge. If you are familiar with standard Windows program setup procedures you may want to skip the rest of this section. Save the executable named pfcalc-1.0-w32.exe somewhere on your computer and run it by double clicking on it's icon. The license agreement will show up first:
Press the "I Agree" button to accept the terms of the GNU GPL. Next you must choose a folder where you want to install pfcalc:

After pressing the "Install" button the pfcalc files will be extracted to the chosen location:
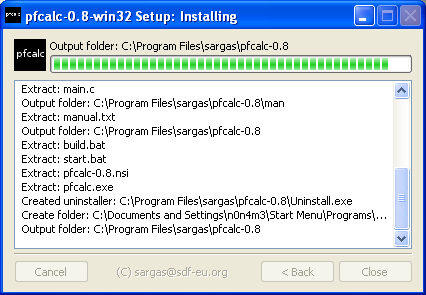
After the setup is complete you can dismiss the window by using the "Close" button:

To start pfcalc use the shortcut provided in Start->All Programs->pfcalc. A window similar with the one below should appear:

This is a cmd.exe window with the PATH environment variable modified to allow running of the pfcalc.exe from any directory, for convenience.
The *nix version of pfcalc 1.0 can be downloaded from the project hosting at Sourceforge. If you are familiar with installing programs from source on unix-like systems you may want to skip the rest of this section. Save the tarball named pfcalc-1.0.tar.gz somewhere on your computer, open a terminal, navigate to where you have saved the tarball and issue these commands:
		$ tar xzf pfcalc-1.0.tar.gz


		$ cd pfcalc-1.0


		$ ./configure


		$ make


		# make install # this must be run as root
Working with pfcalc is basically the same on all supported platforms. The screen-shots presented below are taken from a Linux system but the commands will run equally well on Windows, Mac OS X and BSD systems. This section assumes you have installed pfcalc as described in section 2.1 or 2.2. Note that throughout this guide all text in "code style" represent commands that must be typed in a terminal and followed by an (implied) enter or return key. To see the available options for pfcalc type:
pfcalc 
The program has two modes of operation. It can take data from command line arguments or it can read data from an input file. If running with data from the command line arguments, at least three arguments must always be present: diameter, length and flow-rate. If the user fails to supply all these three mandatory arguments the above help screen will be displayed. The most simple use case is computing pressure loss in a pipe with known diameter and length and a given flow-rate:
pfcalc -d 101.4 -l 5 -f 60 After issuing this command pfcalc will print the results in tabular format, showing the velocity (v), Reynolds number (Re), hydro-static pressure loss (hs), minor pressure loss (ml), major pressure loss (Ml) and total pressure loss (Tl). The total pressure loss is the sum of the other pressure losses. Since we did not specify an elevation change the hydro-static pressure loss is obviously zero. Also, since we did not specify a K-factor (meaning there are no fittings installed in the pipeline) the minor losses are zero. The only pressure loss is due to friction with the pipe wall (major pressure loss).

A more complex example is presented below. Beside the there mandatory arguments we also specify the total K-factor of the fittings installed in the pipeline (-K option) and also an elevation change of 1 metre (-z option).
pfcalc -d 101.4 -l 5 -f 70 -z 1 -K 1.25 
The other mode of operation of the program is to read data from a comma separated values file. The file can be created and exported from your favourite office suite (I recommend Libreoffice) or it can be crafted by hand with your favourite text editor (I recommend vim). A sample file is included with the pfcalc package and can also be downloaded from the project website. When opening this file, if asked by your spreadsheet application, choose UTF-8 encoding. The file is specified with the -i option:
pfcalc -i test.csv 
This how-to will guide you in downloading, installing, and using gpfcalc 1.0, the GTK+ 2.0 front-end for pfcalc.
The Windows version of gpfcalc 1.0 can be downloaded from the project hosting at Sourceforge. If you are familiar with standard Windows program setup procedures you may want to skip the rest of this section. Save the executable named gpfcalc-1.0-w32.exe somewhere on your computer and run it by double clicking on it's icon. The license agreement will show up first:

Press the "I Agree" button to accept the terms of the GNU GPL. Next you must choose a folder where you want to install gpfcalc:

After pressing the "Install" button the gpfcalc files will be extracted to the chosen location:

After the setup is complete you can dismiss the window by using the "Close" button:

The *nix version of gpfcalc 1.0 can be downloaded from the project hosting at Sourceforge. If you are familiar with installing programs from source on unix-like systems you may want to skip the rest of this section. Save the tarball named gpfcalc-1.0.tar.gz somewhere on your computer, open a terminal, navigate to where you have saved the tarball and issue these commands:
		$ tar xzf gp;fcalc-1.0.tar.gz


		$ cd gpfcalc-1.0


		$ ./configure


		$ make


		# make install # this must be run as root
This section assumes that you have installed gpfcalc as described in section 3.1 or 3.2. In Windows, to start gpfcalc, use the shortcut provided in Start->All Programs->gpfcalc. For *nix systems there is no standard portable way of creating menu entries. This should be handled by every systems package management tools. If installing from source, the user should create a launcher suitable with his favourite working environment (I recommend fluxbox). The rest of the section describes using gpfcalc on a Windows XP machine, but it applies just as well to *nix systems.
After launching gpfcalc, two windows are opened. The first window is the main window, shown below. It comprises a menu, a tool bar, a table and a status bar.

The second window is a console window that displays pfcalc output and any errors or warnings from the GTK+ toolkit.

The main menu is used to control the application. The following menus are provided:

Every row in the table represents a pipeline with it's associated data. The first seven cells in a row can be edited, while the remaining seven cells are read-only. The last row can be duplicated by using the "Add" command. The "Remove" command deletes the last row. To duplicate a row you can use the "+" button located at the right end of the row. To remove a particular row you can use the "-" button.

After filling in the table with the desired data, the "Calculate" command can be used to run the pfcalc back-end which computes the pressure losses for each pipeline. A "Calculation complete" message box will appear on screen to inform the user that the calculation was successful.

After dismissing the message box, the results can be viewed in the table. Total values are produced for every pressure loss category. This are displayed below the table. By default all rows are added to the totals. To exclude a particular row you can toggle the button at the start of the row (the index button).

The next screen-shot shows the results of opening the sample test.csv file and running the "Calculate" command on it.

This how-to will guide you in downloading, installing, and using Qpfcalc, the Qt4 front-end for pfcalc.
The Windows version of Qpfcalc 1.5 can be downloaded from the project hosting at Sourceforge. If you are familiar with standard Windows program setup procedures you may want to skip the rest of this section. Save the executable named Qpfcalc-1.5-w32.exe somewhere on your computer and run it by double clicking on it's icon. Note that the following screenshots are taken from the setup of version 1.0 but the install of version 1.5 is similar. The license agreement will show up first:

Press the "I Agree" button to accept the terms of the GNU GPL. Next you must choose a folder where you want to install Qpfcalc:

After pressing the "Install" button the gpfcalc files will be extracted to the chosen location:

After the setup is complete you can dismiss the window by using the "Close" button:

The *nix version of Qpfcalc 1.5 can be downloaded from the project hosting at Sourceforge. If you are familiar with installing programs from source on unix-like systems you may want to skip the rest of this section. Save the tarball named Qpfcalc1.5.tar.gz somewhere on your computer, open a terminal, navigate to where you have saved the tarball and issue these commands:
		$ tar xzf Qpfcalc1.5.tar.gz


		$ cd Qpfcalc1.5


		$ qmake


		$ make


		# make install # this must be run as root
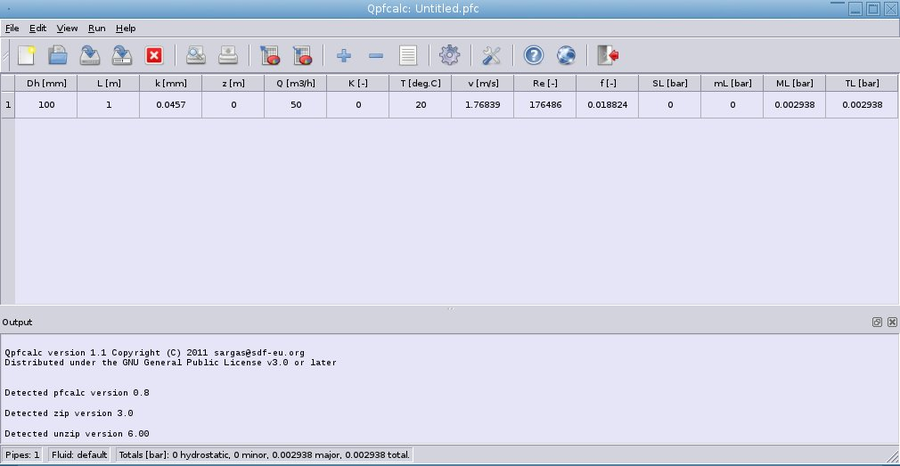
On MS Windows the Qpfcalc application can be started using the shortcut found at: Start->Programs->Qpfcalc. Initially, the Qpfcalc main window should look similar to the one below:
This page was last updated on 07/03/2012.